pin it button

Tuesday, January 31, 2017

Last Day for January Specials

Today is the last day of January, which means the last day to get our awesome January specials. Don't miss out!


1.  Welcome Home Wreath Special (get it 4 ways, 3 of which are FREE!)
2.  January Stamp of the Month
--------------------------

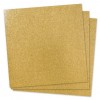
1.  Welcome Home Wreath Special:  This beautiful wreath kit comes pre-cut with step-by-step instructions.


The kit includes:

  • 12" thick and sturdy chipboard wreath base (finished wreath will measure approximately 15")
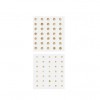
  • gold foil alphabet stickers
  • all shapes die cut (including flowers, leaves and more)
  • step-by-step instructions
There are 4 ways to get it (and 3 of them are FREE!):
  1. Order $60 (before shipping and tax) and it's FREE! 
  2. Host a Close To My Heart Gathering and when your sales total $250 or more (before shipping and tax), you get it FREE!  $250 is so easy to reach!
  3. Sign up as a Close To My Heart Consultant (costs $75 and you get over $200 in products) and in January, this wreath kit will be added to your New Consultant Kit for FREE!
  4. Order it for $18.95.


Wondering what you need to complete the kit?  Only a Quilling Tool and some Liquid Glass.  This kit is so easy to put together that even a beginner can do it!

2.  January Stamp of the Month (Adore You):  This set features 7 beautiful sentiments, in different sizes and elegant fonts, 4 different image designs, and is perfect for Valentines, wedding cards, thank you's and all-occasion cards, as well as scrapbook pages.


This set is yours for only $5 ($12.95 savings) in January only with every $50 you order (before shipping and tax).  Order $100, get 2...and so on. When ordering on my website, you'll be prompted to add your set(s) before checking out. Easy, peasy!


Monday, January 30, 2017

Valentine Card and Embossing Instructions


This cards is almost exactly the same as another card I posted earlier in the month. This is the card I'm talking about. As you can see, the only real difference is that I switched out the patterned papers with cardstock. I wanted to show you how, with just a few minor changes, you can take the same design and give it a whole different look.


I created both cards with the January Stamp of the Month (Adore you). This stamp set is only available in January (that means your time to get it is running out quickly...don't miss it!), and is yours for only $5 ($12.95 savings) with every $50 you order (before shipping and tax). When ordering on my website, you'll be prompted to add your set(s) before checking out. Easy Peasy, ain't no teasy!


One of my favorite stamping techniques is embossing.  As you can see on this close up, it gives anything you make an elegant feel.  My favorite colors to emboss in are gold (as on this card), silver, and white (love it on a dark or bright color. It just pops, like on this card I shared earlier this month, also made with the January Stamp of the Month). As elegant as it looks, it easy as pie!


1.  Stamp the image you wan to emboss in Versamark Ink.
2.  Sprinkle embossing powder of your color choice on top of stamped image.
3.  Shake off excess powder (I do this onto a sheet of paper so I can bend it and easily pour it back into it's jar to use again)
4.  If you still have some grains of embossing powder sticking to your paper, not the image, use a small paint brush to carefully brush those off. If  you don't they will emboss too when you move on to step 5.
5.  Using your heat gun, wave the heat over the image until you see it "melt" into the embossed image you were going for. I saw "wave" because if you just hold the gun and let the air blow right in one spot, you can sometimes scorch your paper.  No bueno!

Voila!  Embossing complete!  I've included a full list of all of the products I used on this card below, complete with photos and links for your convenience.


Friday, January 27, 2017

Easy Valentine Craft


Here's an extra fun (and EASY) little Valentine craft.  Even children could do this for their class Valentines. It's THAT easy! 


Wednesday, January 25, 2017

Snow Layout


We have had snow here in American Fork, UT every day for the past 6 days. It's been crazy, but so beautiful. I thought in honor of all of this snow, it would be a good time to share this little layout I whipped up of our grandson, Street, out playing in it.  This layout was based on a design from my friend, Beckie Lehman. I love it! Beautiful design, Beckie!

You might look at this layout and think it took a whole lot of paper packs. If you thought that,  you were wrong. YAY! Here's a case where being wrong was a GOOD thing.  This layout has White Daisy Cardstock and the Adventure Fundamentals Paper Pack, and that's the only paper I used! COOL BEANS!  Our Fundamentals paper packs have many colors and designs in each pack.


I think you're going to be surprised how few products were used to create this gorgeous 2-page spread. The Good Life Fundamental Complements Collection that I used for almost all of the accents is full of brightly colored stickers and glittery chipboard accents that look just perfect with the Adventure Fundamentals papers. The only other accents I used on these pages are Gold Shimmer Trim and Gold Sequins.


Here are a few close ups of some of the details on this layout:
Don't you just love all of the sparkly accents? I think they are perfect with the white, sparkly snow. I love how the bright green picks up the cuff of Streets coat, the bright blue picks up his hat, and the orange is just a fun accent to pull it all together. There are such fun, bright colors in the Adventure color palette.


Tuesday, January 24, 2017

5 x 7 Valentine Card with Watercolor Painting Tips


I love how soft and sweet this 7" x 5" Valentine turned out. I used the January Stamp of the Month for the heart, flowers and sentiment, and the rest of the card is just patterned papers, glitter cardstock, and a few embellishments (see product list at the end of this post).

January Stamp of the Month - Adore You


I stamped the heart and flowers in our Tuxedo Black Memento Pad, then embossed the "Be mine, Valentine" sentiment in gold.  I then used my watercolor paints to softly paint the large heart, flowers and leaves. I thought the "love" paper from the Whimsy Fundamentals Paper Collection was the perfect patterned paper for this card. It's soft and water-color-ey feeling, don't you think?  I've included a list of the products I used on this card at the very end of this post, complete with photos and links.  I'll also share some watercoloring tips in a second, but first let me remind you how you can get this stamp set:  this set is yours for only $5 with every $50 you order (before shipping and tax).  When ordering on my website, you'll be prompted to add your $5 set(s) before checking out. Easy, peasy, mac and cheesy!


This close up of the stamped and watercolored image can help you see the sublety of the paints a little better. Here are a few watercolor painting tips:
  • Less is more! It's so tempting to add a ton of color, but when it dries it's even brighter than you thought it would be.  It's easy to go back and add more color if you want to, but much harder to take it away. If, by chance you get too much, dip your brush back in water and carefully lift some of the color off.
  • Use plenty of water mixed with your paint.  Use your paint lid to mix the colors with water (in our paints, there is a little circle for each color to color mix/water mix in the lid!), and even mix some colors together with the water to get the custom color you are looking for.
  • Do your best not to go over the stamped lines with your paints, it can sometimes make your stamped lines look a little chalk-y.  All of that practice staying in the lines in kindergarten will pay off!
  • Use the appropriate sized paintbrush for each area you are painting.  I used the very smallest tipped brush on the flowers and leaves, and the one a bit larger on the heart.


LinkWithin

Related Posts with Thumbnails